1. Bloc Pattern là gì
Bloc Pattern là một Pattern :D, mục đích chính của Pattern này là tách code business logic ra khỏi UI thay vì gộp chung logic và UI vào cùng 1 file. Code business logic được tách ra đó được đặt tên là Bloc (Business Logic Component). Bên cạnh đó, nó giúp quản lý state của 1 màn hình tốt hơn vì các state sẽ được quản lý ở Bloc tách biệt với UI. Chính vì thế, mỗi màn hình trong flutter sẽ tạo ra 1 bloc để xử lý logic và quản lý logic của màn hình đó.
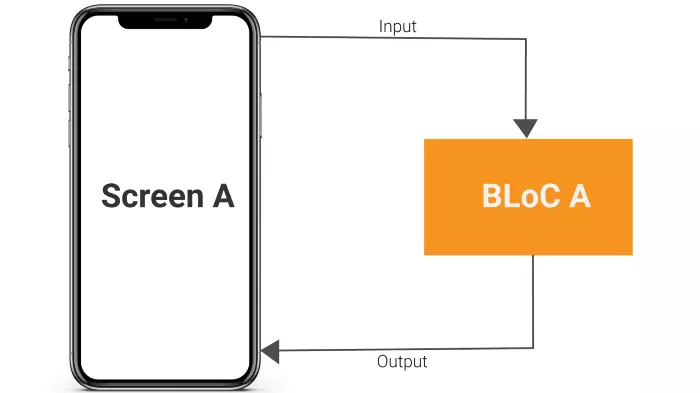
Bloc định nghĩa ra các state, các event. Bloc nhận event từ UI, xử lý logic, biến chuyển state và bắn về UI để cập nhật giao diện. Tư tưởng của bloc khá giống với ReactorKit trong Swift.
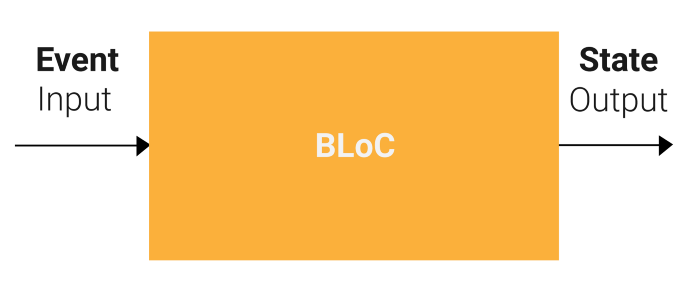
Trong Bloc, để nhận event input và phát ra state output, chúng ta cần sử dụng tới Stream Controller để triển khai. Input sẽ được thêm vào sink của StreamController và phía UI sẽ sử dụng stream để lắng nghe nhận state mỗi khi có event được add vào sink
2. Ví dụ minh họa
Để hiểu hơn về bloc, chúng ta sẽ làm 1 màn hình đơn giản như sau:
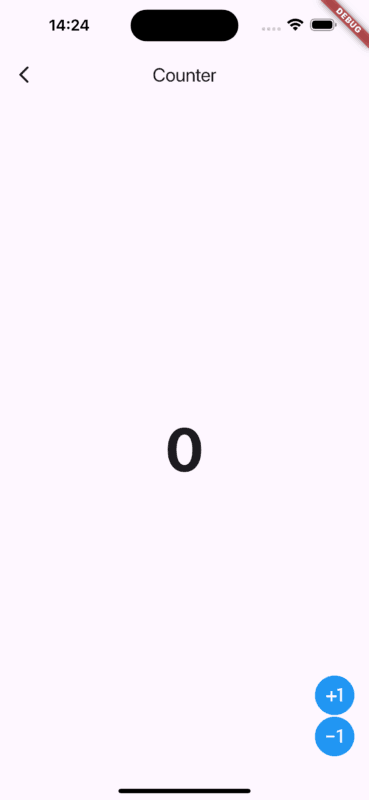
Màn hình bao gồm 1 Text hiển thị số, 2 Button +1 và -1 để tăng hoặc giảm số trên màn hình 1 đơn vị.
Như vậy, có thể dễ dàng nhận thấy có 2 event là tăng và giảm, state chính là giá trị được hiển thị lên màn hình. Tiến hành code thôi nào.
Bước 1: Định nghĩa các event
abstract class CounterEvent {}

class IncrementEvent extends CounterEvent {
  IncrementEvent(this.value);
  final int value;
}

class DecrementEvent extends CounterEvent {
  DecrementEvent(this.value);
  final int value;
}
Như đã phân tích ở trên, event bao gồm tăng và giảm. Chúng ta sẽ tạo ra 2 lớp event là IncrementEvent và DecrementEvent. 2 lớp này đều có giá trị đầu vào là value với ý nghĩa là tăng hoặc giảm bao nhiêu đơn vị. Trong bài toán cụ thể này, value sẽ bằng 1.
Bước 2: Định nghĩa state
class CounterState {
  CounterState({required this.count});
  int count;

  CounterState copyWith({int? count}) {
    return CounterState(count: count ?? this.count);
  }
}
Tạo lớp CounterState để quản lý các state của màn hình. Trong đó, count là state để hiển thị bộ đếm lên màn hình.
Bước 3: Code logic trong Bloc
Tạo 1 file counter_bloc.dart để chứa logic. Như đã giới thiệu ở trên, nhiệm vụ của bloc là nhận event từ UI, xử lý event và cập nhật lại state. UI lắng nghe state để cập nhật giao diện.
class CounterBloc {
  // Khởi tạo state, init giá trị khởi tạo
  var state = CounterState(count: 0);

  // Khởi tạo event controller để nhận event từ UI
  final eventController = StreamController<CounterEvent>.broadcast();
  // Khởi tạo state controller để truyền state đến UI
  final stateController = StreamController<CounterState>.broadcast();

  CounterBloc() {
    eventController.stream.listen((event) {
      if (event is IncrementEvent) {
        state = state.copyWith(count: state.count + event.value);
      } else if (event is DecrementEvent) {
        state = state.copyWith(count: state.count - event.value);
      }
      stateController.sink.add(state);
    });
  }

  void dispose() {
    stateController.close();
    eventController.close();
  }
}
Bước 4: Tích hợp bloc vào UI
import 'package:bloc_example/screen/counter/counter_bloc.dart';
import 'package:flutter/material.dart';

class CounterScreen extends StatelessWidget {
  // Khởi tạo bloc
  var bloc = CounterBloc();
  @override
  Widget build(BuildContext context) {
    return Scaffold(
        appBar: AppBar(
          title: Text("Counter"),
        ),
        body: Center(
          // Sử dụng StreamBuilder để lắng nghe thay đổi stream của stateController và update lại UI
          child: StreamBuilder(
              stream: bloc.stateController.stream,
              initialData: bloc.state, // Khởi tạo giá trị mặc định
              builder:
                  (BuildContext context, AsyncSnapshot<CounterState> snapshot) {
                return Text(
                  (snapshot.data?.count ?? 0).toString(),
                  style: const TextStyle(
                    fontSize: 70,
                    fontWeight: FontWeight.bold,
                  ),
                );
              }),
        ),
        floatingActionButton: Column(
          mainAxisAlignment: MainAxisAlignment.end,
          children: [
            IconButton(
              onPressed: () {
                // truyền action vào bloc
                bloc.eventController.sink.add(IncrementEvent(1));
              },
              icon: const Icon(
                Icons.plus_one,
                size: 30,
                color: Colors.white,
              ),
              style: const ButtonStyle(
                  backgroundColor: WidgetStatePropertyAll(Colors.blue)),
            ),
            IconButton(
              onPressed: () {
                // truyền action vào bloc
                bloc.eventController.sink.add(DecrementEvent(1));
              },
              icon: const Icon(
                Icons.exposure_minus_1,
                size: 30,
                color: Colors.white,
              ),
              style: const ButtonStyle(
                  backgroundColor: WidgetStatePropertyAll(Colors.blue)),
            ),
          ],
        ));
  }
}
Kết luận
Như vậy, mình đã giới thiệu cơ bản về Bloc Pattern. Để nâng cao hơn về bloc và tăng tốc độ code, các bạn có thể dùng thêm thư viện như flutter_bloc
Nguồn tham khảo:
https://viblo.asia/p/hoc-bloc-pattern-theo-cach-de-hieu-nhat-maGK7JYO5j2


[…] viagra connect […]
[…] farmacia online miglior prezzo […]
[…] apothekennotdienst in der nähe […]